Friday, July 22, 2011

Summer Blooms

This week at Sweet Sassy Diva the design team was asked to use a Christmas cart and put a summer spin on it. I was so excited about this challenge but for some reason it just wouldn't pull together for me. I think I just had brain overload the last couple of weeks and couldn't focus. In the end I did use the flowers that was part of the original idea but the whole layout to a life of it's own and is nothing like what I set out to do. LOL I hope you enjoy my Summer Blooms layout!

 My original idea was to do a card with these flowers made from the snowflake cut on Christmas Cheer. I loved the little flowers but the card cut just wouldn't happen. I started with snowflakes cut from 1/2" to 1 1/4" in two different colors of blue. I stacked them on top of each other and then curled up the edges with a button in the middle to create a flower.

 Here's a side view so you can see the dimension. Aren't they the cutest?
 For the bottom I used a Martha Stewart punch to trim a couple of borders then added a piece of ribbon.

 For the birdhouse I used a great little birdhouse from Winter Frolic. I added a piece of black card stock behind the opening and cut a blue piece for the roof to create different layers. Of course I inked it all up with my cat eye inks. You know I love them! I added more of my snowflake flowers over the branches and a couple more dew drops to create some buds on the branch help balance the whole design out.
I hope you enjoyed my layout this week and all of the other Sweet Sassy Diva designers.
Hugz

Details:
Winter Frolic - Birdhouse cut at 4 1/2"  Pg 63
Christmas Cheer - Flowers cut at 1/2" - 1 1/2" Pg. 106
Ribbon - Karen Foster
Martha Stewart punch
DCWV paper stacks
Buttons
Dew Drops

Friday, July 15, 2011

So Fun Circus Layout

Hello! This is Tina Gale again with Sweet Sassy Design Team challenge of the week of a circus theme. I decided to work with photos from the Cricut Stampede in March. Our first night we had a wonderful dinner of fair food and carnival games. It was a great way to start a very fun weekend.
Remember you can always click on the photos to see them up closer.
I chose some fun paper from Imaginisce and let it set the tone for my layout.  
I cut the tent several times out of different paper to paper piece it since it didn't have layers. This is really easy to do when a certain cut doesn't have the layer button.
I cut the clouds twice with one being 1/4" bigger to layer them as well. This is another trick to add layers to your cuts.
The clown is popdotted up for dimension along with a couple of cute tiny buttons to add texture.
A tag for a secondary title or extra journaling. You can also see a little detail I added to the tent up close. I used my Sew Easy and a marker to add faux stitching to the tent. A couple of swirl clips give the illusion of holding the sides back and a couple of brads for the tent tie downs all adds dimension and that extra little bit to make the layout extra special.
The second page I kept pretty simple with just a few great cuts to tie it all together.
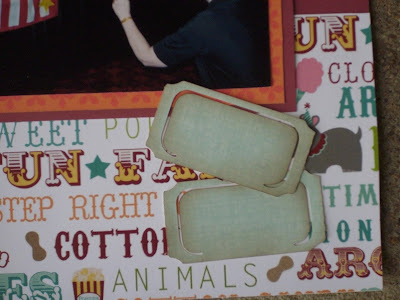
The sun is a favorite cut of mine and a couple of smaller tickets for extra journaling and notes finish the layout. I may also use the clouds for more journaling space if I need it.
Details:
Cartridges:
Paper Doll Dress Up - tent pg 58 Accessory 3 cut fit to page out of several different papers
  I used Daisy D paper for the blue strip and some Coredinations card stock
PDDU - Clown pg 58  5 1/4"
Create a Critter - Clouds pg 55 from 2" - 2 3/4"
Doodlecharms - Sun 2"

Paper:
Imaginisce - Animal Crackers, Come One Come All, background bottom
Colorbok - Red Rick Rac Border, mat and scalloped border
Die Cuts with a View - background

Misc:
Sew Easy
Swirl clips
Buttons
Cat eye inks
Creative Memories Black pen

Thanks for taking the time to check out my layout and be sure to visit me at my blog for more great layouts.
Hugz
Tina Gale

Wednesday, July 6, 2011

Fourth of July

Hello everyone! Tina Gale here back with another layout for sweet sassy diva design team. This time our challenge was a Fourth of July stars theme. I usually don't like to make my layouts before I have the pictures but because of how busy I've been lately with my husbands chemo treatments I decided to get a quick page together for photos that I'm hoping to receive of my son doing the fireworks for the kids camp that he and my daughter work at. I know I'm not the only one that gets things thrown at them that can put a halt on their creative time so I decided to share how you can put together a really quick layout that still has a wow factor.
I decided I'd try and walk you through my thought process when I design a layout and hopefully it will help some of you. Like I said before I never scrap before I have photos because it never works out for me. My photos are never the right size or their the wrong direction for my mats. I also get inspired by my photos so that is where I usually begin. Obviously that's not the case this time but I did start with what I know I want my photo to be of. My children work at a kids summer camp and my son works the activities. One of his biggest thrills of the summer is getting to set off the big fireworks for them on the 4th so I immediately thought of the great silhouettes on A Child's Year. This little boy riding the rocket was perfect! It reminded me of my son and the thrill he gets doing the firework show so that was where I started.
Next I went in search of paper. I had several different patriotic looking papers but this star background was perfect for my quick layout. Sometimes it's very difficult working with patterned paper that has a finished layout look to it. It can look very flat and uninteresting as well as scare some people to cover certain elements on the background up. The key  is not to be afraid of it but use it to it's full advantage. This paper with the glittery stars and fireworks at the bottom left corner was a perfect backdrop for my layout. It brought a lot of interest to the layout without doing anything else but to really give it the 'wow' factor you don't want to stop there and with your cricut it's easy to step it up a notch.

The next element is always a great title and you don't want to forget to leave a place to journal. I chose a great title from Graphically Speaking cut with red and gray for an extra punch.
For the journalling I decided to use some white cardstock cut in 1/2" widths at various lengths to jot down some quick thoughts. It adds some great design interest to a quick layout.

The next element are your photo mats. I chose this wonderful red with silver star paper cut at 4x6 for my photos and then tied some red, white, and blue bakers twine around it for added dimension and design.
Then to tie everything together and help pull the design in I cut stars out in various sizes from 3/4" - 1 1/4" from Graphically speaking and scattered them around the layout.
I also used my bakers twine again to tie around a couple of the stars for some extra 'wow'.
Recipe for Stars for the Fourth
Paper - American collection from the $1 spot at Target
Airmail Bakers Twine - available here
Cricut Cuts:
Fourth of July 1 1/2" - Graphically Speaking - p. 43 
Stars 3/4" - 1 1/4" - Graphically Speaking - p. 43
Boy on rocket 3 1/2" - A Child's Year p. 46

I hope you enjoyed my layout and find my tips helpful the next time you want to create a quick layout. Be sure to visit me at my blog for more great projects! 

Hugz